
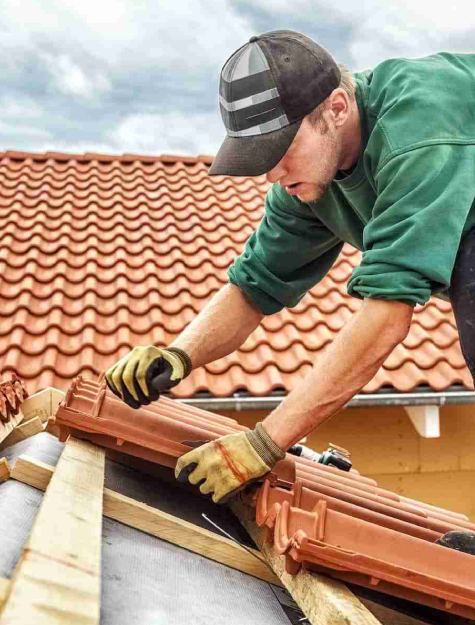
Tile roofing is one of the most popular choices for Tampa homeowners. It holds up well in Florida’s heat, humidity, and hurricane-force winds. But installing it correctly takes skill, the right materials, and a solid understanding of local building codes. If you are planning a tile roof project this summer, here is what the installation process actually looks like from start to finish.
Key Takeaways
- Tile roofing installation in Tampa requires a proper underlayment rated for Florida’s climate.
- The roof deck must be inspected and reinforced before tiles go on.
- Florida building codes have specific requirements for tile fastening and wind resistance.
- Concrete and clay are the two most common tile types used in the Tampa area.
- A licensed roofing contractor should handle tile installation to meet permit requirements.
- Proper flashing around chimneys, vents, and valleys prevents leaks.
- A new tile roof in Tampa can last 40 to 50 years or more with regular maintenance.
Preparing the Roof Before Any Tile Goes On
Good preparation is the foundation of a long-lasting tile roof. Skipping steps here causes problems for years down the road. Every professional installation starts with a full inspection of the existing structure.
Inspecting and Repairing the Roof Deck
Before any tile touches the roof, the deck needs to be checked for soft spots, rot, and damage. In Tampa, humidity and past storm activity can weaken plywood decking faster than in drier climates. Any damaged sections get replaced before the project moves forward.
The deck also needs to be strong enough to support the weight of tile. Concrete tiles can weigh 9 to 12 pounds per square foot. That is significantly heavier than asphalt shingles, so the structure underneath has to be up to the task.
Installing the Right Underlayment
Florida requires a specific type of underlayment for tile roofs. The most common choice is a self-adhering modified bitumen underlayment, sometimes called peel-and-stick. This creates a waterproof barrier beneath the tiles. It also helps the roof comply with Florida’s strict wind mitigation requirements.
A standard 30-pound felt is not sufficient for tile roofing in Florida. You need a product rated for high-wind zones. This layer is what keeps your home dry if a tile cracks or shifts during a storm. The team at Suncoast Roofing Solutions uses underlayment products that meet Florida building code standards for this region.
Tile Selection and Layout Planning
Choosing the right tile and planning the layout before installation saves time and prevents waste. This step also affects the final look of your home.
Concrete vs. Clay Tile
Concrete tiles are durable and cost less than clay. They come in a wide range of colors and profiles, including flat, low-profile S-tile, and high-barrel styles. Clay tiles are lighter and often last longer, but they carry a higher price tag.
Both options perform well in Tampa’s climate. The benefits of tile roofing in Florida include excellent heat resistance, long lifespan, and strong wind ratings when installed correctly. Your contractor can help you pick a tile that fits your home’s style and budget.
Setting the Layout and Battens
Once tiles are selected, installers snap chalk lines across the roof to keep rows straight and even. Horizontal battens, which are thin strips of wood, are sometimes installed to give tiles a surface to rest on. In Florida, this practice requires careful detailing to avoid trapping moisture underneath.
Installers also plan the layout so cuts at the edges look clean and symmetrical. Proper planning here prevents awkward half-tiles at roof edges and ridge lines.
The Tile Installation Process
With prep work done and tiles staged on the roof, the installation can begin. This is the stage most homeowners picture when they think about roofing work.
Fastening Tiles to Meet Florida Wind Code
Florida’s building code requires tile roofs to resist wind uplift. That means every tile must be fastened according to a specific pattern based on your home’s wind zone. In Tampa, most homes fall under a high-wind designation. Installers typically use screws or hurricane clips in addition to mortar or adhesive foam at the eaves and ridges.
Cutting corners on fastening is one of the most common reasons tile roofs fail in storms. A properly installed tile roof can withstand winds of 150 mph or more when done to code. Suncoast Roofing Solutions follows Florida High Velocity Hurricane Zone guidelines on every tile project to make sure your roof is built to last.
Flashing, Ridge Caps, and Finishing Details
Metal flashing goes around every penetration in the roof, including vents, chimneys, and skylights. This is one of the most leak-prone areas on any roof, so flashing must be properly sealed and overlapped. Ridge caps are then set along the peak of the roof using mortar or foam adhesive.
Hip and ridge tiles get extra attention because they take the most wind exposure. Installers finish the edges with rake tiles and seal any open areas where water could get in. The tile roof maintenance you do after installation also depends on how well these details were handled during the job.
Once the job is complete, a final inspection is required to close out the permit. Suncoast Roofing Solutions handles the permitting process from start to finish, so you do not have to manage that on your own.
Frequently Asked Questions
Do I need a permit to install tile roofing in Tampa?
Yes. Tampa requires a permit for any full roof replacement, including tile. Your contractor pulls the permit before work begins and schedules the required inspections. Never hire a contractor who tells you a permit is not needed for a full re-roof.
How long does a tile roof installation take?
Most residential tile roof installations in the Tampa area take between five and ten business days. The timeline depends on the size of the roof, the tile type, and weather conditions. Summer rain in Tampa can cause short delays, so your contractor should build in buffer time.
Can my existing roof structure support tile?
Not always. Tile is much heavier than asphalt shingles, so the framing and decking may need reinforcement. A structural assessment before the project starts tells you whether any upgrades are needed. Skipping this step can lead to sagging or structural damage over time.
What is the lifespan of a tile roof in Florida?
A properly installed tile roof in Florida typically lasts 40 to 50 years. Some clay tile roofs last even longer with regular maintenance. The underlayment beneath the tiles usually needs to be replaced around the 20 to 25 year mark, even if the tiles themselves are still in good shape.
How do I know if my tile roof was installed correctly?
A passed inspection from your local building department is the first sign. You can also look for even tile rows, properly sealed ridge caps, and no visible gaps at the eaves or valleys. If you have concerns about an existing roof, a licensed inspector can assess the installation. You can also view completed work from Suncoast Roofing Solutions in the project gallery to see what a properly finished tile roof looks like.
Ready to Get Your Tile Roof Installed the Right Way?
Tile roofing is a long-term investment in your Tampa home. When it is installed correctly, it adds value, curb appeal, and real storm protection for decades. Getting it done right means working with a contractor who knows Florida’s building codes and has experience with the local climate.
Suncoast Roofing Solutions has been serving Tampa area homeowners, including families in Cheval, FL, since 2009. The team handles everything from permits and deck inspection to final walkthrough. If you are ready to move forward with a tile roof, visit suncoastroofingsolutions.com to request a free estimate and speak with a licensed roofing specialist.